Npm
Содержание:
- Loading Data
- Contributing
- infrastructureLogging
- output.publicPath
- Template strings
- Support
- output.devtoolModuleFilenameTemplate
- Module Contexts
- Release History
- Dynamic Imports
- Other Utilities
- Loading CSS
- devServer.proxy
- amd
- optimization.moduleIds
- Using a Configuration
- devServer
- Карты кода
- devServer.transportMode
- Introduction
- Rule.parser
- Sponsoring
- Обработка изображений
- SourceMapSource
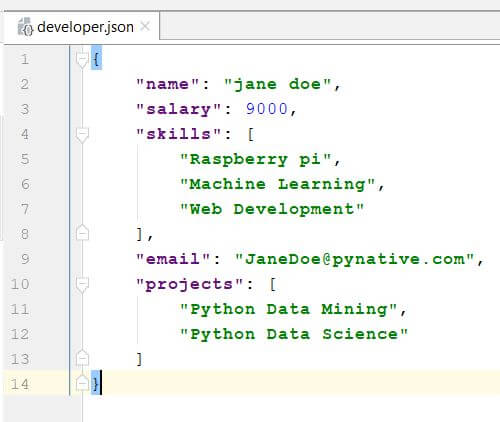
Loading Data
Another useful asset that can be loaded is data, like JSON files, CSVs, TSVs, and XML. Support for JSON is actually built-in, similar to NodeJS, meaning will work by default. To import CSVs, TSVs, and XML you could use the csv-loader and xml-loader. Let’s handle loading all three:
webpack.config.js
Add some data files to your project:
project
src/data.xml
src/data.csv
Now you can any one of those four types of data (JSON, CSV, TSV, XML) and the variable you import, will contain parsed JSON for easy consumption:
src/index.js
Re-run the command and open . If you look at the console in your developer tools, you should be able to see your imported data being logged to the console!
Customize parser of JSON modules
It’s possible to import any , or files as a JSON module by using a instead of a specific webpack loader.
Let’s say you have a , a and a files under folder:
src/data.toml
src/data.yaml
src/data.json5
Install , and packages first:
And configure them in your webpack configuration:
webpack.config.js
src/index.js
Re-run the command and open . You should be able to see your imported data being logged to the console!
Contributing
Contributions go far beyond pull requests and commits. Although we love giving you the opportunity to put your stamp on webpack, we also are thrilled to receive a variety of other contributions including:
- Spelling or grammar fixes
- README.md corrections or redesigns
- Adding unit, or functional tests
- Triaging GitHub issues — especially determining whether an issue still persists or is reproducible.
- Teaching others how to contribute to one of the many webpack’s repos!
Creating your own plugins and loaders
If you create a loader or plugin, we would <3 for you to open source it, and put it on npm. We follow the , naming convention.
infrastructureLogging
Options for infrastructure level logging.
level
Enable infrastructure logging output. Similar to option but for infrastructure. No default value is given.
Possible values:
- — disable logging
- — errors only
- — errors and warnings only
- — errors, warnings, and info messages
- — errors, warnings, info messages, log messages, groups, clears. Collapsed groups are displayed in a collapsed state.
- — log everything except debug and trace. Collapsed groups are displayed in expanded state.
webpack.config.js
debug
Enable debug information of specified loggers such as plugins or loaders. Similar to option but for infrastructure. No default value is given.
webpack.config.js
output.publicPath
This is an important option when using on-demand-loading or loading external resources like images, files, etc. If an incorrect value is specified you’ll receive 404 errors while loading these resources.
This option specifies the public URL of the output directory when referenced in a browser. A relative URL is resolved relative to the HTML page (or tag). Server-relative URLs, protocol-relative URLs or absolute URLs are also possible and sometimes required, i. e. when hosting assets on a CDN.
The value of the option is prefixed to every URL created by the runtime or loaders. Because of this the value of this option ends with in most cases.
Simple rule: The URL of your from the view of the HTML page.
webpack.config.js
For this configuration:
webpack.config.js
A request to a chunk will look like .
A loader outputting HTML might emit something like this:
or when loading an image in CSS:
The webpack-dev-server also takes a hint from , using it to determine where to serve the output files from.
Note that in this parameter will be replaced with a hash of the compilation. See the Caching guide for details.
Examples:
In cases where the of output files can’t be known at compile time, it can be left blank and set dynamically at runtime in the entry file using the free variable .
See for more information on .
Template strings
The following substitutions are available in template strings (via webpack’s internal ):
Substitutions available on Compilation-level:
| Template | Description |
|---|---|
|
Template Description The full hash of compilation |
The full hash of compilation |
|
Template Description Same, but deprecated |
Same, but deprecated |
Substitutions available on Chunk-level:
| Template | Description |
|---|---|
|
Template Description The ID of the chunk |
The ID of the chunk |
|
Template Description The name of the chunk, if set, otherwise the ID of the chunk |
The name of the chunk, if set, otherwise the ID of the chunk |
|
Template Description The hash of the chunk, including all elements of the chunk |
The hash of the chunk, including all elements of the chunk |
|
Template Description The hash of the chunk, including only elements of this content type (affected by ) |
The hash of the chunk, including only elements of this content type (affected by ) |
Substitutions available on Module-level:
| Template | Description |
|---|---|
|
Template Description The ID of the module |
The ID of the module |
|
Template Description Same, but deprecated |
Same, but deprecated |
|
Template Description The hash of the module |
The hash of the module |
|
Template Description Same, but deprecated |
Same, but deprecated |
|
Template Description The hash of the content of the module |
The hash of the content of the module |
Substitutions available on File-level:
| Template | Description |
|---|---|
|
Template Description Filename and path, without query or fragment |
Filename and path, without query or fragment |
|
Template Description Query with leading |
Query with leading |
|
Template Description Fragment with leading |
Fragment with leading |
|
Template Description Only filename (including extensions), without path |
Only filename (including extensions), without path |
|
Template Description Same, but deprecated |
Same, but deprecated |
|
Template Description Only path, without filename |
Only path, without filename |
|
Template Description Only filename without extension or path |
Only filename without extension or path |
|
Template Description Extension with leading |
Extension with leading |
Substitutions available on URL-level:
| Template | Description |
|---|---|
|
Template Description URL |
URL |
The length of hashes (, or ) can be specified using (defaults to 20). Alternatively, specify to configure the length globally.
It is possible to filter out placeholder replacement when you want to use one of the placeholders in the actual file name. For example, to output a file , you have to escape the placeholder by adding backslashes between the brackets. So that generates instead of getting replaced with the of the asset.
Example: generates instead of getting replaced with the .
If using a function for this option, the function will be passed an object containing data for the substitutions in the table above. Substituions will be applied to the returned string too. The passed object will have this type: (properties available depending on context)
Support
We consider webpack to be a low-level tool used not only individually but also layered beneath other awesome tools. Because of its flexibility, webpack isn’t always the easiest entry-level solution, however we do believe it is the most powerful. That said, we’re always looking for ways to improve and simplify the tool without compromising functionality. If you have any ideas on ways to accomplish this, we’re all ears!
If you are twitter savvy you can tweet #webpack with your question and someone should be able to reach out and help also.
If you have discovered a or have a feature suggestion, feel free to create an issue on Github.
output.devtoolModuleFilenameTemplate
This option is only used when uses an options which requires module names.
Customize the names used in each source map’s array. This can be done by passing a template string or function. For example, when using .
webpack.config.js
The following substitutions are available in template strings (via webpack’s internal ):
| Template | Description |
|---|---|
|
Template Description The absolute filename |
The absolute filename |
|
Template Description Automatic and explicit loaders and params up to the name of the first loader |
Automatic and explicit loaders and params up to the name of the first loader |
|
Template Description The hash of the module identifier |
The hash of the module identifier |
|
Template Description The module identifier |
The module identifier |
|
Template Description Explicit loaders and params up to the name of the first loader |
Explicit loaders and params up to the name of the first loader |
|
Template Description The path used to resolve the file and any query params used on the first loader |
The path used to resolve the file and any query params used on the first loader |
|
Template Description The path used to resolve the file without any query params |
The path used to resolve the file without any query params |
|
Template Description The modules namespace. This is usually the library name when building as a library, empty otherwise |
The modules namespace. This is usually the library name when building as a library, empty otherwise |
When using a function, the same options are available camel-cased via the parameter:
If multiple modules would result in the same name, is used instead for these modules.
Module Contexts
These options describe the default settings for the context created when a dynamic dependency is encountered.
Example for an dynamic dependency: .
Example for an dynamic dependency: .
Example for an dynamic dependency: .
Here are the available options with their defaults:
webpack.config.js
A few use cases:
- Warn for dynamic dependencies: .
- should include the whole directory:
- should not include subdirectories by default:
- makes missing exports an error instead of warning
- Set the inner regular expression for partial dynamic dependencies :
Contributors
sokra skipjack jouni-kantola jhnns dylanonelson byzyk pnevares fadysamirsadek nerdkid93 EugeneHlushko superburrito lukasgeiter skovy smelukov opl- Mistyyyy anshumanv chenxsan
Release History
- 4.0.0 — Update to . Update and dependencies. Emit instead of when watching (@jeroennoten). Fix error when compiler throws an error (@renminghao). Fix error when stats is undefined (@Simek).
- 3.2.0 — Ability to use multiple compilers (@saschagehlich).
- 3.1.0 — Better error output (@hi-q).
- 3.0.1 — Fix fonts being passed through streams (@mattlewis92).
- 3.0.0 — Remove special handling of source maps. Update dependencies.
- 2.3.0 — Emit stats.compilation.errors as (@JakeChampion).
- 2.2.0 — Add support for source maps (@OliverJAsh).
- 2.1.0 — Avoid modifying options by reference (@shinuza). Replace log with correct package name (@vinnymac).
- 2.0.0 — Rename to webpack-stream and now it’s totally not a gulp plugin.
- 1.5.0 — Update webpack to 1.9.x (@nmccready). Update other dependencies.
- 1.4.0 — Update webpack to 1.8.x (@Zolmeister).
- 1.3.2 — Fix another place with ? in name (@raphaelluchini).
- 1.3.1 — Fix for paths with ? in their name (@raphaelluchini).
- 1.3.0 — Updating to webpack >= 1.7.
- 1.2.0 — Updating to webpack >= 1.5, vinyl >= 0.4, memory-fs >= 0.2.
- 1.1.2 — Fixes to default stats for logging (@mdreizin).
- 1.1.1 — Add additional stats to default logging (@mdreizin).
- 1.1.0 — Exposes internal webpack if asked via
- 1.0.0 — Support named chunks pipe’d in for multiple entry points.
- 0.4.1 — Fixed regression for multiple entry point support.
- 0.4.0 — Display an error message if there are no input files (@3onyc). Add message on why task is not finishing, Add ability to track compilation progress, Add ability to configure stats output via options (@kompot). Bump webpack version (@koistya).
- 0.3.0 — Update deps (@kompot). Fixes to determining entry (@btipling and @abergs).
- 0.2.0 — Support for mode (@ampedandwired).
- 0.1.0 — Initial release
Dynamic Imports
Two similar techniques are supported by webpack when it comes to dynamic code splitting. The first and recommended approach is to use the that conforms to the ECMAScript proposal for dynamic imports. The legacy, webpack-specific approach is to use . Let’s try using the first of these two approaches…
Before we start, let’s remove the extra and from our configuration in the above example as they won’t be needed for this next demonstration:
webpack.config.js
We’ll also update our project to remove the now unused files:
project
Now, instead of statically importing , we’ll use dynamic importing to separate a chunk:
src/index.js
The reason we need is that since webpack 4, when importing a CommonJS module, the import will no longer resolve to the value of , it will instead create an artificial namespace object for the CommonJS module. For more information on the reason behind this, read webpack 4: import() and CommonJs.
Let’s run webpack to see separated out to a separate bundle:
As returns a promise, it can be used with functions. Here’s how it would simplify the code:
src/index.js
Other Utilities
There are a few other tools that can help when dealing with legacy modules.
When there is no AMD/CommonJS version of the module and you want to include the , you can flag this module in . This will cause webpack to include the module without parsing it or resolving and statements. This practice is also used to improve the build performance.
Lastly, there are some modules that support multiple module styles; e.g. a combination of AMD, CommonJS, and legacy. In most of these cases, they first check for and then use some quirky code to export properties. In these cases, it could help to force the CommonJS path by setting via the .
Loading CSS
In order to a CSS file from within a JavaScript module, you need to install and add the style-loader and css-loader to your configuration:
webpack.config.js
Module loaders can be chained. Each loader in the chain applies transformations to the processed resource. A chain is executed in reverse order. The first loader passes its result (resource with applied transformations) to the next one, and so forth. Finally, webpack expects JavaScript to be returned by the last loader in the chain.
The above order of loaders should be maintained: comes first and followed by . If this convention is not followed, webpack is likely to throw errors.
This enables you to into the file that depends on that styling. Now, when that module is run, a tag with the stringified css will be inserted into the of your html file.
Let’s try it out by adding a new file to our project and import it in our :
project
src/style.css
src/index.js
Now run your build command:
Open up in your browser again and you should see that is now styled in red. To see what webpack did, inspect the page (don’t view the page source, as it won’t show you the result, because the tag is dynamically created by JavaScript) and look at the page’s head tags. It should contain the style block that we imported in .
Note that you can, and in most cases should, for better load times in production. On top of that, loaders exist for pretty much any flavor of CSS you can think of — postcss, sass, and less to name a few.
devServer.proxy
Proxying some URLs can be useful when you have a separate API backend development server and you want to send API requests on the same domain.
The dev-server makes use of the powerful http-proxy-middleware package. Check out its for more advanced usages. Note that some of ‘s features do not require a key, e.g. its feature, but you will still need to include a key in your configuration here, otherwise won’t pass it along to ).
With a backend on , you can use this to enable proxying:
webpack.config.js
A request to will now proxy the request to .
If you don’t want to be passed along, we need to rewrite the path:
webpack.config.js
A backend server running on HTTPS with an invalid certificate will not be accepted by default. If you want to, modify your configuration like this:
webpack.config.js
Sometimes you don’t want to proxy everything. It is possible to bypass the proxy based on the return value of a function.
In the function you get access to the request, response, and proxy options.
- Return or to continue processing the request with proxy.
- Return to produce a 404 error for the request.
- Return a path to serve from, instead of continuing to proxy the request.
E.g. for a browser request, you want to serve an HTML page, but for an API request you want to proxy it. You could do something like this:
webpack.config.js
If you want to proxy multiple, specific paths to the same target, you can use an array of one or more objects with a property:
webpack.config.js
Note that requests to root won’t be proxied by default. To enable root proxying, the option should be specified as a falsy value:
webpack.config.js
The origin of the host header is kept when proxying by default, you can set to to override this behaviour. It is useful in some cases like using .
webpack.config.js
amd
Set the value of or . Setting to will disable webpack’s AMD support.
webpack.config.js
Certain popular modules written for AMD, most notably jQuery versions 1.7.0 to 1.9.1, will only register as an AMD module if the loader indicates it has taken special allowances for multiple versions being included on a page.
The allowances were the ability to restrict registrations to a specific version or to support different sandboxes with different defined modules.
This option allows you to set the key your module looks for to a truthy value. As it happens, the AMD support in webpack ignores the defined name anyways.
optimization.moduleIds
Tells webpack which algorithm to use when choosing module ids. Setting to tells webpack that none of built-in algorithms should be used, as custom one can be provided via plugin. By default is set to .
The following string values are supported:
| Option | Description |
|---|---|
|
Option Description Numeric ids in order of usage. |
Numeric ids in order of usage. |
|
Option Description Readable ids for better debugging. |
Readable ids for better debugging. |
|
Option Description Module names are hashed into small numeric values. |
Module names are hashed into small numeric values. |
|
Option Description Numeric ids focused on minimal initial download size. |
Numeric ids focused on minimal initial download size. |
webpack.config.js
option is useful for long term caching, but still results in smaller bundles compared to . Length of the numeric value is chosen to fill a maximum of 80% of the id space. By default a minimum length of 3 digits is used when is set to . To override the default behaviour set to and use the .
webpack.config.js
Using a Configuration
As of version 4, webpack doesn’t require any configuration, but most projects will need a more complex setup, which is why webpack supports a configuration file. This is much more efficient than having to manually type in a lot of commands in the terminal, so let’s create one:
project
webpack.config.js
Now, let’s run the build again but instead using our new configuration file:
A configuration file allows far more flexibility than simple CLI usage. We can specify loader rules, plugins, resolve options and many other enhancements this way. See the configuration documentation to learn more.
devServer
This set of options is picked up by webpack-dev-server and can be used to change its behavior in various ways. Here’s a simple example that gzips and serves everything from our directory in the project root:
webpack.config.js
When the server is started, there will be a message prior to the list of resolved modules:
that will give some background on where the server is located and what it’s serving.
If you’re using dev-server through the Node.js API, the options in will be ignored. Pass the options as a second parameter instead: . See here for an example of how to use webpack-dev-server through the Node.js API.
Карты кода
Запустите сервер разработки командой () и посмотрите в консоль. Наш код выводит туда строку
Если вы кликнете по адресу скрипта и перейдете в панель Sources, то увидите файл сборки. Сейчас он небольшой, но когда разрастется, в нем сложно будет ориентироваться. Было бы лучше отлаживать приложение, имея доступ к исходным файлам. Для этого мы используем карты кода. Чтобы webpack включил их, нужно передать ему опцию .
webpack.config.js
JavaScript
module.exports = (env, argv) => ({
devtool: ‘source-map’,
// …
})
|
1 2 3 4 5 6 |
module.exports=(env,argv)=>({ devtool’source-map’, // … })
|
Теперь остановите сервер и снова запустите его. Адрес скрипта в консоли изменился, теперь это исходник, а не билд.
devServer.transportMode
This option allows us either to choose the current transport mode for client/server individually or to provide custom client/server implementation. This allows to specify how browser or other client communicates with the .
The current default mode is . This mode uses SockJS-node as a server, and SockJS-client on the client.
mode will become the default mode in the next major version. This mode uses ws as a server, and native WebSockets on the client.
Use mode:
To create a custom client implementation, create a class that extends .
Using path to , a custom WebSocket client implementation, along with the compatible server:
To create a custom server implementation, create a class that extends .
Using path to , a custom WebSocket server implementation, along with the compatible client:
Using class exported by , a custom WebSocket server implementation, along with the compatible client:
Using custom, compatible WebSocket client and server implementations:
Introduction
webpack is a bundler for modules. The main purpose is to bundle JavaScript
files for usage in a browser, yet it is also capable of transforming, bundling,
or packaging just about any resource or asset.
TL;DR
- Can create a single bundle or multiple chunks that are asynchronously loaded at runtime (to reduce initial loading time).
- Dependencies are resolved during compilation, reducing the runtime size.
- Loaders can preprocess files while compiling, e.g. TypeScript to JavaScript, Handlebars strings to compiled functions, images to Base64, etc.
- Highly modular plugin system to do whatever else your application requires.
Rule.parser
An object with parser options. All applied parser options are merged.
Parsers may inspect these options and disable or reconfigure themselves accordingly. Most of the default plugins interpret the values as follows:
- Setting the option to disables the parser.
- Setting the option to or leaving it enables the parser.
However, parser plugins may accept more than just a boolean. For example, the internal can accept an object instead of to add additional options for a particular Rule.
Examples (parser options by the default plugins):
If is an then option may be an object or a function that describes a condition whether to encode file contents to Base64 or emit it as a separate file into the output directory.
If is an or then option may be an object that describes the encoding of the module source or a function that encodes module’s source by a custom algorithm.
See Asset Modules guide for additional information and use cases.
Sponsoring
Most of the core team members, webpack contributors and contributors in the ecosystem do this open source work in their free time. If you use webpack for a serious task, and you’d like us to invest more time on it, please donate. This project increases your income/productivity too. It makes development and applications faster and it reduces the required bandwidth.
This is how we use the donations:
- Allow the core team to work on webpack
- Thank contributors if they invested a large amount of time in contributing
- Support projects in the ecosystem that are of great value for users
- Support projects that are voted most (work in progress)
- Infrastructure cost
- Fees for money handling
Обработка изображений
Для полноты картины добавим в проект обработку изображений. Да-да, изображения точно так же можно подключить в JavaScript-модуль, значит, их импорт необходимо обрабатывать.
Добавим в папку изображение (выберите сами картинку, которая вам нравится, она может быть совершенно любой). Импортируйте ее в файле index.js и добавьте в документ:
index.js
JavaScript
import src from ‘./image.jpg’;
const image = new Image();
image.src = src;
document.body.appendChild(image);
|
1 2 3 4 5 6 |
import src from’./image.jpg’; constimage=newImage(); image.src=src; document.body.appendChild(image);
|
Нужный нам лоадер называется file-loader, и он очень прост – просто переносит файлы из одного места в другое (из папки в папку ). Установите его и добавьте в конфигурационный файл для всех форматов изображений:
Shell
yarn add file-loader —dev
(npm i -D file-loader)
|
1 2 3 4 |
yarn add file-loader—dev (npmi-Dfile-loader)
|
webpack.config.js
JavaScript
module: {
rules: [
// …
{
test: /\.(gif|png|jpe?g|svg)$/i,
use: ‘file-loader’
}
]
}
|
1 2 3 4 5 6 7 8 9 10 11 |
module{ rules // … { test/\.(gif|png|jpe?g|svg)$/i, use’file-loader’ } } |
Перезапустите сервер в режиме разработки – у нас появилась картинка
Обратите внимание на ее название – оно отличается от исходного. Это результат работы лоадера file-loader
Изображение необязательно импортировать прямо в JavaScript-код. Куда чаще мы работаем с ним в CSS, например, устанавливая в качестве фона. Добавьте, например, в ваш инструкцию:
style.css
CSS
body {
background: url(./image.jpg);
}
|
1 2 3 4 5 |
body { backgroundurl(./image.jpg); } |
Webpack обнаружит ее и правильно обработает подключение картинки.
Закончим наш вводный туториал оптимизацией изображений. Это очень важный момент, ведь тяжелые неоптимизированные картинки могут здорово ухудшить производительность вашего сайта. Скучную работу по оптимизации тоже можно свалить на webpack, достаточно лишь подключить image-webpack-loader:
Shell
yarn add image-webpack-loader —dev
(npm i -D image-webpack-loader)
|
1 2 3 4 |
yarn add image-webpack-loader—dev (npmi-Dimage-webpack-loader)
|
Теперь добавим новый лоадер в конвейер обработки изображений:
webpack.config.js
JavaScript
module: { rules: [
// …
{
test: /\.(gif|png|jpe?g|svg)$/i,
use:
}
]
}
|
1 2 3 4 5 6 7 8 9 10 11 12 13 14 15 16 17 18 |
module{ rules // … { test/\.(gif|png|jpe?g|svg)$/i, use ‘file-loader’, { loader’image-webpack-loader’, options{ disableargv.mode===’development’ } } } } |
Первое, на что нужно обратить внимание, – лоадер определен не просто строкой, а целым объектом. Его название указано в поле , кроме того, есть некоторые опции
Второе – мы блокируем работу лоадера в режиме разработки, чтобы не тратить ресурсы. Помните, что переменная , содержащая параметры, переданные с консольной командой, доступна нам потому, что мы определили экспорт файла как функцию.
Если вы запустите команду () и сравните размеры картинки до (в папке ) и после (в папке ), то увидите, как продуктивно поработал лоадер.
Итак, у нас есть вполне работоспособная, хоть и минимальная, конфигурация webpack, но главное – мы разобрались с основными принципами его работы и больше его не боимся!!
Вот полный код конфигурационного файла:
Версии используемых пакетов:
SourceMapSource
Represents source code with SourceMap, optionally having an additional SourceMap for the original source.
newSourceMapSource(sourceCodeString,nameString,sourceMapObject|String,originalSource?String,innerSourceMap?Object|String,removeOriginalSource?boolean)
- : The source code.
- : The filename of the original source code.
- : The SourceMap for the source code.
- : The source code of the original file. Can be omitted if the already contains the original source code.
- : The SourceMap for the /.
- : Removes the source code for from the final map, keeping only the deeper mappings for that file.
The supports «identity» mappings for the .
When original source matches generated source for a mapping it’s assumed to be mapped char by char allowing to keep finer mappings from .