Sass для самых маленьких — подробное руководство
Содержание:
- Введение
- #Metadata updates
- gulp-watch
- Что выбрать — Grunt или Gulp?
- #Signature
- What’s new in 4.0?!
- What’s new in 4.0?!
- #Signature
- PostCSS
- Use latest JavaScript version in your gulpfile
- Современная сборка 2020 для frontend. Gulp4 +10
- Начало
- Пишем первую задачу Gulp
- Use latest JavaScript version in your gulpfile
- Создание проекта
- #Chokidar instance
- 3 Подготовка PHP для работы с Gulp
- Обновление Gulp v4
- Запускаем задачу gulp-uglify в Gulp
- Разворачивание готовой сборки одной командой
- SassScript
- Task Runner Explorer
- #Symbolic links on Windows
Введение
Gulp — это таск-менеджер для автоматического выполнения часто используемых задач
(например, минификации, тестирования, объединения файлов), написанный на
языке программирования JavaScript.
Программное обеспечение использует
командную строку для запуска задач, определённых в файле Gulpfile.
Создан как ответвление от проекта Grunt, чтоб взять из него лучшие практики.
Распространяется через менеджер пакетов
NPM
под MIT лицензией.
Если Вы будете копировать код с этой страницы — имейте в виду, что я ставлю кое-где лишние
проблелы — исключительно для того, чтобы текст лучше помещался на экран. Смело удаляйте их.
Это основная статья об использовании Gulp.
В данный момент Вы можете помимо этой прочитать также статьи:
|
Как скопировать папку с помощью Gulp |
|
|
Объединить и сжать несколько css файлов в один |
|
|
Как отправить файлы по ftp с помощью Gulp |
|
| Gulp series | |
| Обработка только изменённых файлов с помощью gulp.watch().on(‘change’) |
#Metadata updates
Whenever the stream creates a file, the Vinyl object’s , , and are compared to the created file. If they differ, the created file will be updated to reflect the Vinyl object’s metadata. If those properties are the same, or gulp doesn’t have permissions to make changes, the attempt is skipped silently.
This functionality is disabled on Windows or other operating systems that don’t support Node’s or methods. This is due to Windows having unexpected results through usage of and .
Note: The method internally converts and timestamps to seconds. This division by 1000 may cause some loss of precision on 32-bit operating systems.
gulp-watch
gulp-watch is the name of a Gulp plugin that tracks file changes. Starting from the fourth
Gulp version gulp-watch is included in the main package and does not require separate installation.
Let’s start with a simple one — we make a function that each time the index.html file is changed to
The app folder will display a warning.
What it looks like in Gulp 4
To start monitoring write
gulp watch
Using gulpfile ~\Desktop\Sites\heihei\gulpfile.js
Starting ‘watch’…
Change something in index.html and save
Starting ‘html’…
Someone edited index.html!
In Gulp 3 it used to look like this:
Create a folder /app/assets/styles/ , to keep all .css filsed for development
We will write a function that will collect all the .css files from this folder, process them using sass,
and merge them into a single file. Someone has edited. Someone has edited.
/app/temp/styles/style.css
We already wrote such a function above, just change it a little.
Add .css file monitoring gulp.watch( «./app/assets/styles/**/*.css», style);
Now, as soon as we edit one of the styles files, watch will notice this change, pass it through sass, and collect all the files into one.
Why do we need SASS:
to use css variables. Create a variable, which then
embed in .css pass through sass compiler and when suddenly you need to be everywhere
change the value of this variable, for example, the main color will change on the site, everything
what we will need to do is change one variable in one file.
to do style attachments (nested css)
to use mixins
Что выбрать — Grunt или Gulp?
Выбор средства запуска задач (task runner) обычно зависит от личных предпочтений или специфики проекта, если только вы не используете плагин, поддерживающий лишь конкретное средство запуска задач. Основные отличия в том, что Grunt управляется конфигурационными параметрами в формате JSON и каждая задача Grunt, как правило, должна создавать промежуточные файлы для передачи чего-либо в другие задачи, тогда как Gulp управляется исполняемым JavaScript-кодом (т. е. не только JSON) и может направлять результаты от одной задачи следующей без использования временных файлов. Gulp является более новым инструментом и, как таковой, часто используется в более новых проектах. Тем не менее, Grunt имеет множество общеизвестных средств поддержки, например jQuery, который использует его для создания… jQuery. И Grunt, и Gulp работают через плагины — модули, которые вы устанавливаете для обработки конкретной задачи. Существует огромная экосистема плагинов, и часто встречаются пакеты задач, поддерживающие как Grunt, так и Gulp, поэтому использование одного или другого средства вновь сводится, по сути, к персональному выбору.
#Signature
Copy
watch(globs,options,task)
Parameters
| parameter | type | note |
|---|---|---|
| globs(required) | stringarray | to watch on the file system. |
| options | object | Detailed in below. |
| task | functionstring | A or composed task — generated by and . |
Errors
When a non-string or array with any non-strings is passed as , throws an error with the message, «Non-string provided as watch path».
When a string or array is passed as , throws an error with the message, «watch task has to be a function (optionally generated by using gulp.parallel or gulp.series)».
Options
| name | type | default | note |
|---|---|---|---|
| ignoreInitial | boolean | true | If false, the task is called during instantiation as file paths are discovered. Use to trigger the task during startup.Note: This option is passed to chokidar but is defaulted to instead of . |
| delay | number | 200 | The millisecond delay between a file change and task execution. Allows for waiting on many changes before executing a task, e.g. find-and-replace on many files. |
| queue | boolean | true | When true and the task is already running, any file changes will queue a single task execution. Keeps long running tasks from overlapping. |
| events | stringarray | The events being watched to trigger task execution. Can be , , , , , , and/or . Additionally is available, which represents all events other than and .This option is passed directly to chokidar. | |
| persistent | boolean | true | If false, the watcher will not keep the Node process running. Disabling this option is not recommended.This option is passed directly to chokidar. |
| ignored | arraystringRegExpfunction | Defines globs to be ignored. If a function is provided, it will be called twice per path — once with just the path, then with the path and the object of that file.This option is passed directly to chokidar. | |
| followSymlinks | boolean | true | When true, changes to both symbolic links and the linked files trigger events. If false, only changes to the symbolic links trigger events.This option is passed directly to chokidar. |
| cwd | string | The directory that will be combined with any relative path to form an absolute path. Is ignored for absolute paths. Use to avoid combining with .This option is passed directly to chokidar. | |
| disableGlobbing | boolean | false | If true, all are treated as literal path names, even if they have special characters.This option is passed directly to chokidar. |
| usePolling | boolean | false | When false, the watcher will use (or fsevents on Mac) for watching. If true, use polling instead — needed for successfully watching files over a network or other non-standard situations. Overrides the default.This option is passed directly to chokidar. |
| interval | number | 100 | Combine with . Interval of file system polling.This option is passed directly to chokidar. |
| binaryInterval | number | 300 | Combine with . Interval of file system polling for binary files.This option is passed directly to chokidar. |
| useFsEvents | boolean | true | When true, uses fsevents for watching if available. If explicitly set to true, supersedes the option. If set to false, automatically sets to true.This option is passed directly to chokidar. |
| alwaysStat | boolean | false | If true, always calls on changed files — will slow down file watcher. The object is only available if you are using the chokidar instance directly.This option is passed directly to chokidar. |
| depth | number | Indicates how many nested levels of directories will be watched.This option is passed directly to chokidar. | |
| awaitWriteFinish | boolean | false | Do not use this option, use instead.This option is passed directly to chokidar. |
| ignorePermissionErrors | boolean | false | Set to true to watch files that don’t have read permissions. Then, if watching fails due to EPERM or EACCES errors, they will be skipped silently.This option is passed directly to chokidar. |
| atomic | number | 100 | Only active if and are false. Automatically filters out artifacts that occur from «atomic writes» by some editors. If a file is re-added within the specified milliseconds of being deleted, a change event — instead of unlink then add — will be emitted.This option is passed directly to chokidar. |
What’s new in 4.0?!
- The task system was rewritten from the ground-up, allowing task composition using and methods
- The watcher was updated, now using chokidar (no more need for gulp-watch!), with feature parity to our task system
- First-class support was added for incremental builds using
- A method was exposed to create symlinks instead of copying files
- Built-in support for sourcemaps was added — the gulp-sourcemaps plugin is no longer necessary!
- Task registration of exported functions — using node or ES exports — is now recommended
- Custom registries were designed, allowing for shared tasks or augmented functionality
- Stream implementations were improved, allowing for better conditional and phased builds
What’s new in 4.0?!
- The task system was rewritten from the ground-up, allowing task composition using and methods.
- The watcher was updated, now using chokidar (no more need for gulp-watch!), with feature parity to our task system.
- First-class support was added for incremental builds using .
- A method was exposed to create symlinks instead of copying files.
- Built-in support for sourcemaps was added — the gulp-sourcemaps plugin is no longer necessary!
- Task registration of exported functions — using node or ES exports — is now recommended.
- Custom registries were designed, allowing for shared tasks or augmented functionality.
- Stream implementations were improved, allowing for better conditional and phased builds.
#Signature
Copy
dest(directory,options)
Parameters
| parameter | type | note |
|---|---|---|
| directory(required) | stringfunction | The path of the output directory where files will be written. If a function is used, the function will be called with each Vinyl object and must return a string directory path. |
| options | object | Detailed in below. |
Returns
A stream that can be used in the middle or at the end of a pipeline to create files on the file system.
Whenever a Vinyl object is passed through the stream, it writes the contents and other details out to the file system at the given directory. If the Vinyl object has a property, a symbolic link will be created instead of writing the contents. After the file is created, its to match the Vinyl object.
Whenever a file is created on the file system, the Vinyl object will be modified.
- The , , and properties will be updated to match the created file.
- The property will be updated to match the file on the file system.
- If the property is a stream, it will be reset so it can be read again.
Errors
When is an empty string, throws an error with the message, «Invalid dest() folder argument. Please specify a non-empty string or a function.»
When is not a string or function, throws an error with the message, «Invalid dest() folder argument. Please specify a non-empty string or a function.»
When is a function that returns an empty string or , emits an error with the message, «Invalid output folder».
Options
For options that accept a function, the passed function will be called with each Vinyl object and must return a value of another listed type.
| name | type | default | note |
|---|---|---|---|
| cwd | stringfunction | The directory that will be combined with any relative path to form an absolute path. Is ignored for absolute paths. Use to avoid combining with . | |
| mode | numberfunction | of the Vinyl object | The mode used when creating files. If not set and is missing, the process’ mode will be used instead. |
| dirMode | numberfunction | The mode used when creating directories. If not set, the process’ mode will be used. | |
| overwrite | booleanfunction | true | When true, overwrites existing files with the same path. |
| append | booleanfunction | false | If true, adds contents to the end of the file, instead of replacing existing contents. |
| sourcemaps | booleanstringfunction | false | If true, writes inline sourcemaps to the output file. Specifying a path will write external at the given path. |
| relativeSymlinks | booleanfunction | false | When false, any symbolic links created will be absolute.Note: Ignored if a junction is being created, as they must be absolute. |
| useJunctions | booleanfunction | true | This option is only relevant on Windows and ignored elsewhere. When true, creates directory symbolic link as a junction. Detailed in below. |
PostCSS
Previously, you already read about the SASS preprocessor, which along with LESS and Stylus is the standard
for many projects.
I do not use them, but prefer the more modern PostCSS, which has a more modular
structure, and accordingly
more flexible and quick
Whatever pre or post processor you choose, you need to master working with it, learn
perform simple tasks and move on to more complex tasks such as
gulp.watch().on(‘change’)
More details about PostCSS I put to
PostCSS
article.
You can read about PostCSS and return to this article or to one of the following, more
advanced chapters.
I did not post a description of working with PostCSS here, because it can be run
not just using gulp
Use latest JavaScript version in your gulpfile
Most new versions of node support most features that Babel provides, except the / syntax. When only that syntax is desired, rename to , install the esm module, and skip the Babel portion below.
Node already supports a lot of ES2015+ features, but to avoid compatibility problems we suggest to install Babel and rename your to .
npm install --save-dev @babel/register @babel/core @babel/preset-env
Then create a .babelrc file with the preset configuration.
{
  "presets":  "@babel/preset-env"
}
And here’s the same sample from above written in ES2015+.
import gulp from 'gulp';
import less from 'gulp-less';
import babel from 'gulp-babel';
import concat from 'gulp-concat';
import uglify from 'gulp-uglify';
import rename from 'gulp-rename';
import cleanCSS from 'gulp-clean-css';
import del from 'del';

const paths = {
  styles: {
    src: 'src/styles/**/*.less',
    dest: 'assets/styles/'
  },
  scripts: {
    src: 'src/scripts/**/*.js',
    dest: 'assets/scripts/'
  }
};

/*
 * For small tasks you can export arrow functions
 */
export const clean = () => del( 'assets' );

/*
 * You can also declare named functions and export them as tasks
 */
export function styles() {
  return gulp.src(paths.styles.src)
    .pipe(less())
    .pipe(cleanCSS())
    // pass in options to the stream
    .pipe(rename({
      basename: 'main',
      suffix: '.min'
    }))
    .pipe(gulp.dest(paths.styles.dest));
}

export function scripts() {
  return gulp.src(paths.scripts.src, { sourcemaps: true })
    .pipe(babel())
    .pipe(uglify())
    .pipe(concat('main.min.js'))
    .pipe(gulp.dest(paths.scripts.dest));
}

 /*
  * You could even use `export as` to rename exported tasks
  */
function watchFiles() {
  gulp.watch(paths.scripts.src, scripts);
  gulp.watch(paths.styles.src, styles);
}
export { watchFiles as watch };

const build = gulp.series(clean, gulp.parallel(styles, scripts));
/*
 * Export a default task
 */
export default build;
Современная сборка 2020 для frontend. Gulp4 +10
- 17.02.20 02:04
•
Den-V
•
#484714
•
Хабрахабр
•
Tutorial
•
•
4900
JavaScript, Node.JS, Разработка веб-сайтов, CSS, HTML

Начало
Посмотрев на календарь, я понял, что уже 2020, а посмотрев на свою сборку, которая была с 2018 года, я понял, что пора её менять. В этой статье мы разберем структуру проекта, плагины (минимальный набор функционала) и их новые возможности, которые добавились за такое большое время. Мы разберем все моменты, чтобы новичок мог себе скачать эту сборку и начать с ней работать.
Не только древность моей сборки мотивировала на эту статью, но и еще одна причина: мне больно смотреть, когда заходят на онлайн-сервисы для конвертации , минификации и других рутинных задач. Самое забавное — когда сделали мелкую правку, снова нужно проходить все круги ада копипаста.
Пишем первую задачу Gulp
Базовый синтаксис задачи Gulp:
gulp.task(‘task-name’, function() {
});
|
1 2 3 |
gulp.task(‘task-name’,function(){ }); |
task-name ссылается на имя задачи, которое вы будете использовать для запуска задачи. Задачу можно запустить командой gulp task-name.
Для теста создадим задачу hello, которая выведет Hello Zell!
gulp.task(‘hello’, function() {
console.log(‘Hello Zell’);
});
|
1 2 3 |
gulp.task(‘hello’,function(){ console.log(‘Hello Zell’); }); |
Запустим команду gulp hello в командной строке.
В командной строке появится сообщение Hello Zell!
Задачи в Gulp обычно намного сложнее. Вот как может выглядеть реальная задача:
gulp.task(‘task-name’, function () {
gulp.src(‘source-files’) // Get source files with gulp.src
.pipe(aGulpPlugin()) // Sends it through a gulp plugin
.pipe(gulp.dest(‘destination’)) // Outputs the file in the destination folder
})
|
1 2 3 4 5 |
gulp.task(‘task-name’,function(){ gulp.src(‘source-files’)// Get source files with gulp.src .pipe(aGulpPlugin())// Sends it through a gulp plugin .pipe(gulp.dest(‘destination’))// Outputs the file in the destination folder }) |
Как вы видите, реальная задача содержит два дополнительных метода gulp.src и gulp.dest .
gulp.src говорит, какие файлы использовать для выполнения задачи.
gulp.dest указывает, куда положить файлы после выполнения задачи.
Создадим реальную задачу, где мы скомпилируем Sass файлы в Css.
Use latest JavaScript version in your gulpfile
Most new versions of node support most features that Babel provides, except the / syntax. When only that syntax is desired, rename to , install the module, and skip the Babel portion below.
Node already supports a lot of ES2015+ features, but to avoid compatibility problems we suggest to install Babel and rename your to .
npm install --save-dev @babel/register @babel/core @babel/preset-env
Then create a .babelrc file with the preset configuration.
{"presets""@babel/preset-env"}
And here’s the same sample from above written in ES2015+.
importgulpfrom'gulp';importlessfrom'gulp-less';importbabelfrom'gulp-babel';importconcatfrom'gulp-concat';importuglifyfrom'gulp-uglify';importrenamefrom'gulp-rename';importcleanCSSfrom'gulp-clean-css';importdelfrom'del';constpaths={ styles{ src'src/styles/**/*.less', dest'assets/styles/'}, scripts{ src'src/scripts/**/*.js', dest'assets/scripts/'}};exportconstclean=()=>del('assets');exportfunctionstyles(){returngulp.src(paths.styles.src).pipe(less()).pipe(cleanCSS()).pipe(rename({ basename'main', suffix'.min'})).pipe(gulp.dest(paths.styles.dest));}exportfunctionscripts(){returngulp.src(paths.scripts.src,{ sourcemapstrue}).pipe(babel()).pipe(uglify()).pipe(concat('main.min.js')).pipe(gulp.dest(paths.scripts.dest));}functionwatchFiles(){gulp.watch(paths.scripts.src, scripts);gulp.watch(paths.styles.src, styles);}export{watchFilesaswatch};constbuild=gulp.series(clean,gulp.parallel(styles, scripts));exportdefaultbuild;
Создание проекта
Двигаемся дальше. Теперь создайте папку проекта в удобном месте вашего компьютера. Назовем ее, например, gproject.
Перейдем в папку проекта и запустим консоль команд для данного каталога. Наиболее быстрый вариант сделать это зажать клавишу «Shift» и удерживая ее щелкнуть правой кнопкой мыши на пустой области окна каталога. Откроется контекстное меню, в котором выбираем «Открываем окно PowerShell здесь«. Данный пункт может называться и по другому — «Открыть окно команд«.

Запускаем инициализацию проекта командой:
Заполняем необходимые поля проекта по шагам и желательно латиницей. После ввода названия жмем Enter и переходим с следующему шагу.
- package-name: вводим название проекта маленькими буквами
- version: оставляем по умолчанию — 1.0.0
- description: вводим описание проекта, например, My first gulp project.
- entry point: (index.js), test command:, git repository:, keywords: — данные шаги оставляем по умолчанию, жмем Enter и переходим к следующему шагу
- author: впишите имя автора, я ввел Zaur Magomedov
- license: оставляем по умолчанию
- Is this ok? — вводим «yes» и жмем Enter поле чего в папке нашего проекта появится файл package.json.

Файл package.json содержит в себе информацию о проекте + информацию об установленных пакетах (плагинов). Это своего рода файл манифеста. Теперь давайте установим Gulp локально в папку нашего проекта. Для этого пишем следующую команду:
флаг —save-dev как раз говорит установщику установить gulp локально в папку нашего проекта.
При установке gulp название пакета и его версия автоматически пропишутся в файле package.json. Вообще такой подход позволяет сохранять файл package.json со всеми установленными пакетами (зависимости), а при разворачивании нового проекта достаточно скопировать данный файл и запустить команду установки в консоли проекта — и все пакеты в проект установятся автоматически. Сейчас может вам будет не совсем понятно, но дальше я уверен вы поймете.
И так, после установки gulp в папке проекта должна появиться папка node_modules, она содержит в себе необходимые зависимости. Также все новые установленные зависимости, прописываемые в package.json будут складываться именно в данную папку. Так что ничего не трогайте в ней и не удаляйте. Не пугайтесь если увидите в ней много файлов и папок.
Давайте откроем файл package.json реактором кода и взглянем на его содержимое.
Мы видим всю ту информацию, которую вводили при инициализации проекта + ниже в блоке «devDependencies» указаны установленные зависимости и их версии. В данном случае это gulp версии 3.9.1. Как я и говорил установилась локально именно та версия, что стоит глобально.
#Chokidar instance
The method returns the underlying instance of chokidar, providing fine-grained control over your watch setup. Most commonly used to register individual event handlers that provide the or of the changed files.
When using the chokidar instance directly, you will not have access to the task system integrations, including async completion, queueing, and delay.
Copy
const{ watch }=require(‘gulp’);
const watcher =watch(‘input/*.js’);
watcher.on(‘change’,function(path, stats){
console.log(`File ${path} was changed`);
});
watcher.on(‘add’,function(path, stats){
console.log(`File ${path} was added`);
});
watcher.on(‘unlink’,function(path, stats){
console.log(`File ${path} was removed`);
});
watcher.close();
Registers functions to be called when the specified event occurs.
| parameter | type | note |
|---|---|---|
| eventName | string | The events that may be watched are , , , , , , , or . |
| eventHandler | function | Function to be called when the specified event occurs. Arguments detailed in the table below. |
| argument | type | note |
|---|---|---|
| path | string | The path of the file that changed. If the option was set, the path will be made relative by removing the . |
| stats | object | An object, but could be . If the option was set to , will always be provided. |
Shuts down the file watcher. Once shut down, no more events will be emitted.
Adds additional globs to an already-running watcher instance.
| parameter | type | note |
|---|---|---|
| globs | stringarray | The additional globs to be watched. |
Removes globs that are being watched, while the watcher continues with the remaining paths.
| parameter | type | note |
|---|---|---|
| globs | stringarray | The globs to be removed. |
3 Подготовка PHP для работы с Gulp
Для этого тебе сначала нужно понять, как это вообще будет работать, не опираясь на конкретный язык программирования, и лишь потом решить, что же из PHP нужно использовать. Благо вариантов не очень много, да и продумывать почти нечего.
Алгоритм следующий:
- Нужно при запросе на включение из админпанели запустить процесс Gulp в фоне и сохранить его PID где-нибудь.
- При запросе на выключение нужно проверить PID и убить работающий под ним процесс Gulp.
- При запросе статистики можно проверить существование работающего по текущему PID процесса Gulp и вернуть результат.
- Весь output фонового процесса Gulp стоит сохранять в файл и при желании можно также настроить отправку содержимого этого файла в админпанель по запросу (В статье не рассматривается этот пункт, можешь реализовать его в виде домашнего задания).
Вроде просто, теперь, какие средства PHP тебе понадобятся.
Самое первое и простое, это класс где-то из на сайте PHP. Я его немного модифицировал и использую вот такой:
И класс, который будет запускать именно Gulp и контролировать его состояние, :
Вроде всё лаконично и понятно. Осталось привязать это всё к админпанели.
Обновление Gulp v4
Хорошая новость в том, что Вы можете обновить и протестировать новую версию на конкретном проекте без изменения всех ваших Gulp файлов. Это идеальный вариант, если нужно понять что может новая версия, но вы пока не готовы сжечь все мосты))
Вам придется обновить глобальный пакет до версии 4, но версия 3 все еще будет работать для каждого локального проекта, где это необходимо.
Глобальная установка Gulp v4
Для начала нужно удалить текущий глобальный пакет Gulp перед установкой новой версии.
Знак $ означает, что команды надо выполнять в консоли и писать его не надо.
Эти команды удалят текущую версию и установят v4 из ветки gulp-cli 4.0
Убедитесь, что первая команда не вызвала никаких ошибок при выполнении. Только после этого запускайте следующую. В зависимости от Вашей операционной системы, возможно, Вам потребуется вводить sudo, чтобы выполнить команду под Администратором.
Чтобы проверить какая версия установлена глобально, запустите следующую команду:
Если Вы откроете консоль в папке проекта, то под строкой CLI version будет указана локальная версия.
Локальная установка gulp 4
После глобальной установки, нужно установить gulp для локального проекта.
Подобно установке глобального пакета, удаляем локальную версию и устанавливаем v4.
Если в вашем gulp перечислен под , замените флаг на .
Теперь Вы имеете установленный и готовый к работе gulp v4. Это можно проверить запустив команду
Обновление gulpfile
После того, как мы все установили, нужно внести некоторые изменения в на gulpfile.js. Самый простой способ это запустить Gulp и исправить появившиеся ошибки.
Возможно, Вы увидите что-то подобное:
Это говорит нам о том, что ошибка вызвана в gulpfile.js на строке 418, символ 6.
Далее мы рассмотрим некоторые ошибки и пути их устранения.
Ошибка о которой я упомянул выше была вызвана в куске кода:
Таск был вызван перед таском
Для устранение этой проблемы, надо запустить их последовательно с помощью метода series
Поскольку Вы открыли круглую скобку перед функцией, не забудьте её закрыть после функции.
Убедитесь, что Вы обновили остальную часть файла по этому примеру.
В четвертой версии появился синтаксис, который позволяет определять порядок запуска задач. Также можно запустить задачи параллельно с помощью .
Асинхронное завершение
Ошибка следующая:
Эта ошибка возникает при использовании анонимной функции (та, которая вызывается после в примере).
Решается передачей параметра в функцию и запуска его после выполнения задачи.
Например:
Gulp watcher с событиями change и пути к файлам
В третьей версии Gulp, watcher возвращал путь измененного файла внутри функции в которой был вызван. Например, на выходе для примера ниже это будет объект с директорией измененного файла и событием (например, changed).
Watcher может запускать некоторые стандартные функции, но если нужен доступ к имени файла, нужно переписать функцию.
Запускаем задачу gulp-uglify в Gulp
Переходим от слов к делу и запустим на выполнение только что созданную нами задачу . Не забываем, что именованные задачи в Gulp запускаются с указанием их имени:
Вуаля! Видим (по аналогии с предыдушим опытом запуска дефолтной задачи), что именованная задача успешно запустилась, выполнилась за 12 миллисекунд и также успешно завершилась. По идее, теперь по пути у нас должен располагаться минифицированный js-файл (в моем случае это был ).
Посмотрим и видим, что так оно и есть, файлик помещен туда, куда мы и прописывали:
А точно ли он минифицированный? Это легко проверить — открываем его в Sublime Text и наблюдаем такую картину:

Разворачивание готовой сборки одной командой
Вы создали сборку, теперь хотите реально создать на ней проект. Достаточно скопировать папку сборки и запустить установку. Вообще при установке должны устанавливаться все последние версии зависимостей, включая сам gulp (при обновлении глобальной версии). Для этого нам необходимо подредактировать файл package.json. В блоке devDependencies, где перечислены установленные расширения вместо версии необходимо указать ключевое слово — . Вот как теперь выглядит мой файл:

Теперь для быстрого разворачивания проекта необходимо сделать следующее — копируем все файлы проекта Gulp за исключением папки node_modules в другую папку вашего проекта. Открываем локально консоль и вводим команду после чего запуститься установка gulp и всех зависимостей. Все, можно начинать работу.
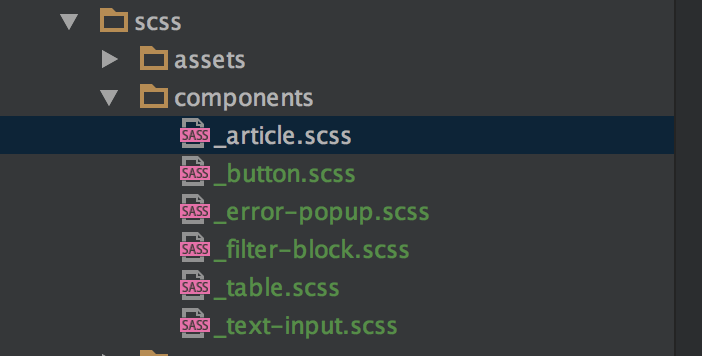
SassScript
SassScript позволяет значително расширить возможности Sass за счет использования пользовательских переменых, арифметических и прочих функций. SassScript может быть использован для автоматической генерации новых селекторов и свойств.
2.1 Переменные в Sass
Это действительно замечательная возможность — определять переменные, которые можно использовать в любом месте вашего Sass файла. Цвета, дефолтные значения, единицы, все это можно взять в переменную и использовать в дальнейшем. Переменная определяется так: $название: значение.
| Sass | CSS — готовый результат |
$accent: #FF9910 .button background-color: $accent color: #fff |
.button {
	background-color: #FF9910;
	color: #fff;
}
|
2.2 Операции с числами и строками + интерполяция
Sass дает возможность использовать стандартные арифметические операции над числами, такие как сложение (+), вычитание (-), деление (/) и остаток от деления по модулю (%). Операторы сравнения (<, >, <=, >=, ==, !=) также поддерживаются для чисел.
Кроме того, в Sass есть возможность конкатенировать (соединять) строки.
| Sass | CSS — готовый результат |
$summ: 10 + 20 / 2
$cn: content

.selector
	margin:
		top: $summ + px
		bottom: 12px + 8px
	background-color: trans + parent
	#{$cn}: "con" + "tent"
|
.selector {
	margin-top: 20px;
	margin-bottom: 20px;
	background-color: transparent;
	content: "content";
}
|
Как видим из примера $summ: 10 + 20 / 2, соблюдается приоритет в выполнении арифметических операций — сначала деление, потом сложение. Для определения порядка действий, можно использовать круглые скобки, как в математике
Обратите внимание, что при сложении 12px + 8px, мы получим 20px
Обратите также внимание на строки 2 и 9, здесь мы используем интерполяцию для размещения динамических значений в любом месте Sass файла, в том числе и в месте, где у нас идет название свойства, название селектора или в любой строке. Чаще всего интерполяция в Sass используется для получения нового значения переменной, благодаря «интегрированию» в значение другой переменной, посредством конструкции #{}, например:
Чаще всего интерполяция в Sass используется для получения нового значения переменной, благодаря «интегрированию» в значение другой переменной, посредством конструкции #{}, например:
| Sass | CSS — готовый результат |
$in: интер

.interpol
	content: "#{$in}поляция"
|
.interpol {
	content: "интерполяция";
}
|
2.3 Операции с цветами
Цвета в Sass можно складывать, вычетать, делить и умножать. Все арифметические операции выполняются для каждого цвета отдельно: красного, зеленого и синего.
| Sass | CSS — готовый результат |
$color1: #440203 + #550506 $color2: #010203 * 2 $color3: rgba(180, 0, 0, 0.75) + rgba(20, 255, 0, 0.75) body background-color: $color1 color: $color2 border-color: $color3 |
body {
	background-color: #990709;
	color: #020406;
	border-color: rgba(200, 255, 0, 0.75);
}
|
| Sass | CSS — готовый результат |
$translucent-red: rgba(255, 0, 0, 0.5); p color: opacify($translucent-red, 0.3) background-color: transparentize($translucent-red, 0.25) .selector background-color: rgba(#333, 0.75) |
p {
	color: rgba(255, 0, 0, 0.8);
	background-color: rgba(255, 0, 0, 0.25);
}

.selector {
	background-color: rgba(51, 51, 51, 0.75);
}
|
Task Runner Explorer
Visual Studio обеспечивает поддержку Gulp и Grunt через Task Runner Explorer, который включен в Visual Studio 2015 и доступен как Visual Studio Extension. Вы найдете его в View | Other Windows | Task Runner Explorer. Task Runner Explorer весьма впечатляет, так как он распознает, есть ли в вашем проекте gulpfile.js или gruntfile.js, разбирает задачи и предоставляет UI для выполнения найденных задач (рис. 4). Более того, вы можете определять задачи для запуска, когда в вашем проекте происходят заранее определенные операции, о чем я расскажу далее, поскольку ASP.NET 5 использует эту функциональность в своих шаблонах по умолчанию. Просто щелкните правой кнопкой мыши задачу, чтобы выполнить ее или связать с определенной операцией, например для запуска при открытии проекта.
Шаблоны ASP.NET 5, включенные в Visual Studio 2015, используют Gulp, и они устанавливают Gulp в папку node_components вашего проекта, так что все это будет заранее готово для применения в проекте.
Рис. 4. Task Runner Explorer показывает задачи Grunt и Gulp с параметрами
Как иллюстрирует рис. 5, Grunt выводит параметры, когда вы выбираете какую-либо задачу Grunt, которую вы не увидите в случае Gulp, в частности параметры Force, чтобы игнорировать предупреждения, и Verbose (буквы «F» и «V» слева вверху). Это просто параметры, передаваемые в командную строку Grunt. Замечательное качество Task Runner Explorer в том, что он показывает команды, передаваемые им в командную строку Grunt или Gulp (в окне вывода задачи), поэтому вам не придется гадать, что происходит «за кулисами».
Рис. 5. Дополнительные команды Grunt и командная строка
#Symbolic links on Windows
When creating symbolic links on Windows, a argument is passed to Node’s method which specifies the kind of target being linked. The link type is set to:
- when the target is a regular file
- when the target is a directory
- when the target is a directory and the user disables the option
If you try to create a dangling (pointing to a non-existent target) link, the link type can’t be determined automatically. In these cases, behavior will vary depending on whether the dangling link is being created via or via .
For dangling links created via , the incoming Vinyl object represents the target, so its stats will determine the desired link type. If returns false then a link is created, otherwise a or a link is created depending on the value of the option.
For dangling links created via , the incoming Vinyl object represents the link — typically loaded from disk via . In this case, the link type can’t be reasonably determined and defaults to using . This may cause unexpected behavior if you are creating a dangling link to a directory. Avoid this scenario.